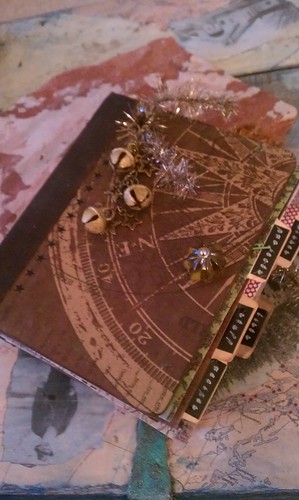
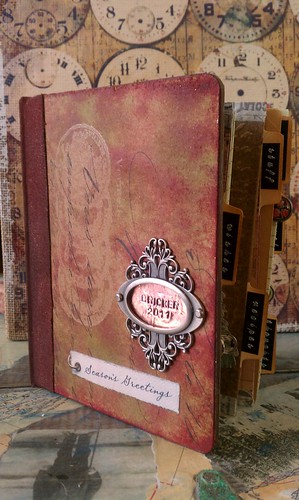
So as promised, I am going to share with you some (poor quality) pictures depicting how I assembled my holiday junque books. I am sorry the lighting in my craft area is so poor! What will be shown here is just how to assemble the book, it is up to you to personalize it with what you put inside. Here is one of the books I have finished assembling, but there is much work to be done inside. You will see links at the bottom to see inside a few of my books. I have also made a video tour of my completed book, if you want to check that out.
To create the basic book you will need:
Wendy Vecchi Art Parts: creative covers, size large
Tim Holtz ring binders, size large
Tim Holtz kraft paper
Ranger Sticky Backed Canvas
Tissue Tape
Yes Paste
Distress Stains
Duct Tape
Basic Craft Supplies: pen, scissors

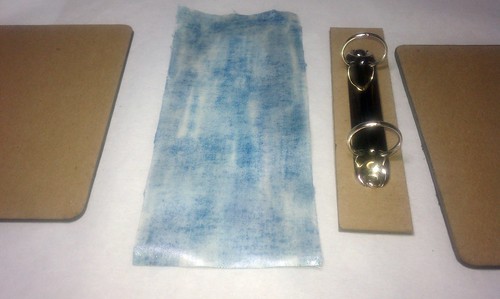
Get your cover ready by using one piece of the cover to trace and cut out your cover design for both front and back. I chose Tim Holtz's kraft paper. I really like how it accepts the stains and how sturdy it is. Cut out your paper and then color how ever you choose. On my first journal I buffed in distress inks with an applicator, in this project I used the distress stain.
Next, prepare your sticky backed canvas. This will act as the binding of our project. I simply colored mine with the distress stain again. You can add some more decorative elements here though. You could stamp a texture stamp, paint or even emboss a design on your spine before binding if you choose. Just remember this will eventually bend, so be sure whatever application you decide on can bend once finished. As you can see above, mine curled a bit when I used a heat tool to dry the stain, it is all good.

Your package of Art Parts will come with extra spines. You have the choice to orientate your book either way. Above I have laid out the proper one for this project.

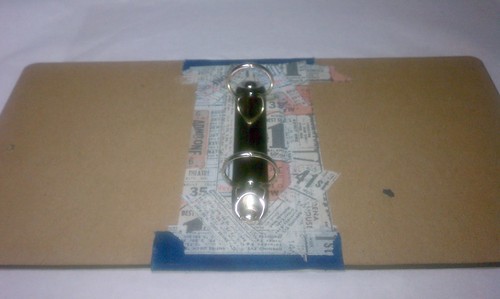
Now simply attach the binder ring to the spine using the brads provided. I learned a trick that helps, but has not perfected the issue of being able to see the brads through the canvas. I then added a bit of duct tape to the back of the spine. It does not matter what this looks like as the canvas will cover it, my duct tape was camouflage in pattern. This assists in covering up the tails of the brads. You will still be able to see them a bit after assembling. Next time I make one, I may try two layers of duct tape. I found this also helps the brads to stay better as well.

I then laid it out to plan the assembly. The band of sticky back canvas I used was four inches. I cut this off the bottom of one sheet. You will need to leave a bit of a gap so that there is room for the covers to move.
Peel the backing from the canvas and carefully place the spine on top.

Add each cover to the binding as well. Be sure to line everything up as straight as you can.

Simply fold up the extra bit of canvas binding material on the top and bottom as shown. Burnish the canvas down well and be sure the canvas has made good contact with the art parts.
Now, I did not like the naked look of the art parts on the inside of my book. So to solve this issue I used a very strong paper adhesive, Yes Paste, along with some tissue tape to cover this area. The tissue tape worked well as I was able to rip bits and layer to get around all of the binder. It is a low tack tape, so adhering this on its own would probably not stand up to the wear and tear I plan on putting on this book. I was sure to use a lot of the paste in the cracks between each book component and get every bit of the tape tacked down.
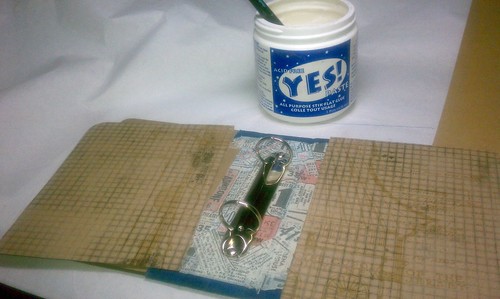
To finish the inside, I used my assembled book as a template to cut out pieces to fit the inside. Again I chose kraft paper as it is tough and really adheres the the covers with the help of the Yes Paste. I covered the inside almost to the edge of the spine.


As you can gather, I ended up disliking the blue and so it ended up brown. I simply went back over everything with more stain. Now the blue shows through a bit and I love the layers of color. To see inside of my book more click here. Below you can also see the first book I made for a secret Santa. To see inside of Beth's book click here.
If your playing along at home, now is the time to embellish at will. I added a book plate with a personalized message on one, a knob on another. You could write out a word in grunge board or chip board. Add a closure or a window peeking inside. I took a big risk and put a hole right in the cover in order to add a large dangle of a charm complete with bells, stars and vintage tinsel.
If your playing along at home, now is the time to embellish at will. I added a book plate with a personalized message on one, a knob on another. You could write out a word in grunge board or chip board. Add a closure or a window peeking inside. I took a big risk and put a hole right in the cover in order to add a large dangle of a charm complete with bells, stars and vintage tinsel.

My inside pages are made from more kraft paper and other holiday paper as well. You will have to use the links above to browse inside. Most pages I simply glued together two pieces of paper and finished the edges with tissue tape. I added tabs, reproduction holiday ephemera, pockets, envelopes, recipe cards, junk mail, past Christmas card covers and anything that inspired me.
Some other ideas: Save your everyday ephemera, now is the perfect time to collect things such as tags from gifts, bits of wrapping paper, ribbons, envelopes, packaging from gifts, Christmas cards, holiday photos from family etc. This is what will make your book uniquely yours. To make your journal ecclectic attach your junque with decorative tape, staples, paper clips, binder clips. Keep your to do lists, holiday invitations, programs from holiday events and pieces of your kids holiday school work inside. Make it your own and don't think twice about it, just stuff it inside and document your busy holiday season. This will be a treasure for years to come.
I hope you found this information helpful and inspirational.
Merry Christmas!
Rhea
wow! Creative and patient. I don't know that I would have enough patience to put the whole book part together binding and all.
ReplyDeleteAwesome work!
I found this very helpful I love your books. Don't you just love the binder rings?
ReplyDeleteThanks Rea, for your instructions, looks wonderful and useful for any bookmaking!
ReplyDeleteVery lovely demonstration for making your junque book. Just knowing what supplies you use really helps to make a book a success!
ReplyDeleteThanks!
As wonderful as this is, it doesn't come close to how delightful your books are in person - so rich and full of textures and colors and treasures.
ReplyDeletethanks for the tutorial Rhea. I love your junque journal. Also blown away by your metal mermaid deck!
ReplyDelete